Package Content
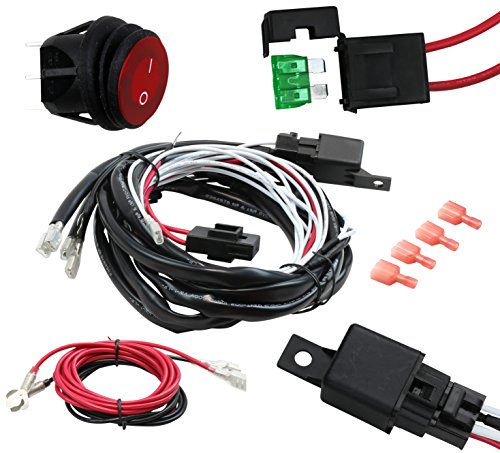
- Power Relay (40A)
- Blade Fuse (30A)
- 2 sets of power connectors to light fixtures
- Illuminated Rocker Switch On/Off Rocker LED
- User Manual
Wiring Instructions:
- Choose your desired mounting location for the switch. Mark and drill one 3/4″ hole.
- Use a sheet metal screw to mount the relay around the battery. Make sure the RED wire from the relay can be connected to the positive terminal of the battery while the BLACK wire can be grounded to the chassis.
- Connect the WHITE wires to the positive input line of the auxiliary lights.
- Connect the BLACK wires to the ground connection line of the auxiliary lights.
- Connect and install the WHITE wire from the relay to the middle pin of the switch (COPPER colored).
- Link the RED wire to the outer pin (COPPER colored) of the switch then route and connect it to a steady power source. Please make sure to use an in-line fuse rated at a minimum of 3A 12V DC when connecting this power feed wire directly to the battery. As your other option, you can also install this wire into an existing power wire in the cabin or into the cabin fuse box and this will exclude the need of an inline fuse.
- Attach the BLACK wire to the pin of the switch (GOLD colored), route it then connect it to the ground chassis.
- Finally, push the switch into the 3/4″ hole that you drilled out (Step 1)
Product Features
- 40A Power Relay & 30A Blade Fuse
- 2 sets of power connectors to light fixtures
- Illuminated Rocker Switch On/Off Rocker LED
- Compatible with power source from 10 to 30 Volt DC.


All is well!
The wiring harness and switch are both great! The problem is with the directions that come … The wiring harness and switch are both great! The problem is with the directions that come with the wiring kit. Step 1 instructs you to drill a 15/16″ hole in the surface where you are mounting the switch. I did that. I then wired everything up and went to insert the switch in the hole, only to have the switch completely pass through the hole in the dashboard of a brand new tractor I just purchased (and hoped to install the switch on)- The hole was way to big. I tried it a second time, this…
Swith problem
Comments are disabled for this post.